Late Saxon disc brooches were made in East Anglia but some of the designs used are Scandinavian, or Viking, in inspiration. They are decorated with animals and curving, interwoven patterns. Some types are very common and may even have been mass-produced. Particular types of Late Saxon brooch are only found in East Anglia. These include brooches depicting a backward-turning animal and others decorated with knotted, interlaced ribbon decoration flowing from a central square. These interlace brooches are known as Borré style brooches, named after a town in Norway.

A zoomorphic Late Saxon imported Viking 9th century gilded convex disc brooch decorated with animal heads. Use this picture as a template for a zoomorphic brooch. (© NCC)
The brooches were made in baked clay moulds that were broken open once the metal had cooled. To make the moulds an impression was taken from a lead model. This mass production means that many of the brooches found in Norfolk are identical. Further details could be added to the brooches by using a punch or stamp.
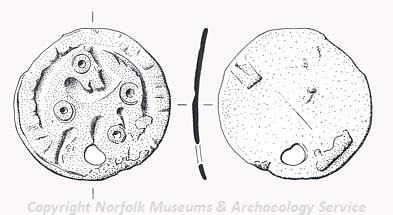
Backward-turning animal brooches

A Late Saxon disc brooch depicting a backwards-turning beast. The brooch was found in Wells-next-the-Sea. Use this picture as a template for a backwards-turning beast brooch. (© NCC)
Backward–turning animal brooches are mostly found in Norfolk and Suffolk although examples have also been found in North Lincolnshire and York. Archaeologists have not agreed about what animal is depicted on the brooches – it might be a dragon, lion, horse or boar. It has four legs, a tail and a mane. Examples have been found at Hillington (NHER 20176), Mundham (NHER 24894) and Thompson (NHER 39736).
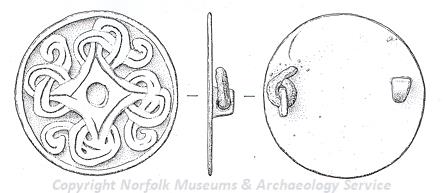
Borré style interlace brooches

A 10th century Borre style disc brooch from Hilborough. Use this picture as a template for a Borre style brooch. (© NCC)
There are several variations on the Borré style brooch that have been found in Norfolk, but this is the most common. Close parallels have been found at Birka, Sweden. The design might come from a Scandinavian pendant. Despite the Scandinavian influence on these brooches, most examples have been found in East Anglia and not on the Continent. Examples have been found at Shropham (NHER 17722), Long Stratton and Tasburgh (NHER 16838) and Fring (NHER 23001).

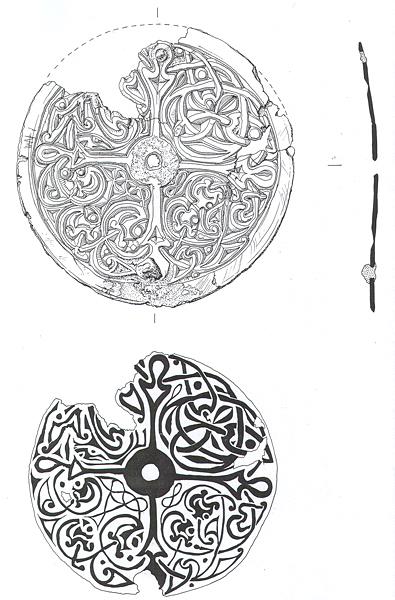
A 10th century gilded bronze disc brooch from Little Snoring with a cross shaped layout and animals depicted between the arms of the cross. (© NCC and S. White.)
Make your own Late Saxon disc brooch
You will need:
Pencil and paper
Colouring pencils, crayons or felt tip pens
Scissors
Glue
Stiff card
Badge back or safety pin
1. Decide which Late Saxon brooch to make. Print out the template.
2. Colour in your design. You could use one colour to make it look like copper, silver of gold. Or you could use your imagination and make it various different colours.
3. Stick the coloured brooch onto a piece of stiff card.
4. Carefully cut around the outline of the brooch.
5. Attach a badge back or safety pin to the back of the card.
To make a more realistic looking Late Saxon brooch you might like to try to emboss the design from the template onto a piece of craft embossing foil.

Late Saxon style disc brooches made during Archaeology Week 2006 at Gressenhall Farm and Workhouse. (© NCC)
You will need:
A piece of thin foam.
Embossing foil
Pencil
Scissors
Glue
Stiff card
Badge back or safety pin
1. Place the embossing foil right side down on the foam. Place the template over the top and draw over the design. Be careful to hold the foil still whilst you do this!
2. Glue the template onto the stiff card.
3. Cut carefully around the template.
4. Glue the embossing foil on top of the card. Cut around the foil leaving about 2cm between the edge of the foil and the card.
5. Cut from the edge of the foil towards the card and fold the foil behind the card.
6. Attach a badge back or safety pin to the back of the card.
A. Cattermole (NLA) and M. Dennis (NLA), 11 September 2006.